Showing posts with label Crafts. Show all posts

Saturday, May 30, 2015

Protect Your Door From Your Wreath Hanger

For years I've used a wreath hanger on our front door but little did I know what damage it was doing to the door. After getting our house repainted last year my husband didn't want me putting it back up so it wouldn't damage the new paint. 

Of course I still wanted to hang my wreaths on the door, so I had to come up with a solution. I got to thinking... how can I protect the door? I kept thinking I must be able to put something on the inside of the wreath hanger (that you wouldn't be able to see) that will protect the door's paint from getting scratched. This is what I came up with....

 What you'll need to protect your door:
- felt (scraps will do)
- a pair of scissors
- a hot glue gun

The greatest part was I already these things I already had around the house.

Step 1: Cut two felt pieces to fit the door hanger.

Step 2: Hot glue felt pieces onto the wreath hanger.

Step 3: Let glue dry and decorate your door!
 Happy Crafting!


Thursday, February 12, 2015

DIY Lightbox

I found this on pinterest a few months ago and have wanted to make one since then. Today was finally that day! It was easy to make and makes the pictures look great!

What you'll need to make your own:
Cardboard Box
Box Cutter
White Tissue Paper
Packing Tape
White Poster Board


Using the box cutter, cut off all the flaps
off of the box.


Cut squares out of three of the four sides.


Cover the square with tissue paper
and tape into place.


Cut poster board slightly smaller then the width of the box.
Make sure that it is long enough to lay inside the box curved.


Tape the poster board to the top of the box.
Flip the box over and align bottom of poster board so
that it's curved inside of the box.


Place the box in natural sunlight for some great pictures.
I hope this will inspire you
(this sign is going to hang in my craft room to remind me to inspire others with my crafts!).
 I found my inspiration here.
This is going to be a great way to photograph yarn and projects!


Happy Crafting!

Thursday, April 10, 2014

DIY Pin Cushion

I love to have pretty, cute, and colorful things around me. I've been wanting a new pin cushion for a long time. First, because my old one wasn't large enough. Second, because removing pins while sewing was awkward to put them back in. And third, because my old pin cushion was not really my style and didn't go with my craft room.

What you'll need to make your own:
- Picture Frame
- Coordinating Fabric
- Stuffing
- Stapler


My first step was to find the perfect picture frame.
I was picky about the shape and color of the frame.
So when I found the perfect shaped frame I decided to paint it the color I wanted.
This frame was originally orange and I painted it black.
(I forgot to take a before picture. Sorry!)


Here are my main supplies.


For my first step I folded over the edge of the fabric on one side and stapled it onto the frame backing.


Inserting the frame backing edge that I previously stapled down,
I then insert stuffing into the fabric so it is sticking out the front of the frame.
Next I pulled on the fabric that is sticking out the backside of the frame, to get any creases out.
Once I have the fabric where I want it, I stapled the rest of the fabric down to the backside of the frame to keep everything in place.


Trim the excess fabric, insert your pins, and enjoy!

Happy Crafting!

Friday, February 14, 2014

Repurpose, Reuse, Recycle

Do you have things laying around your house that you save for sentimental reasons but don't know what to do with it? Repurpose it! I've taken some vases and turned them into dressing table storage for my makeup brushes. The flower pot from the first flower my husband ever gave me when we were dating is in our office and holds pens, pencils, scissors, etc. Our sheets with holes are used to cover our plants when it freezes. Old pillows that were to lumpy to sleep on have been added into the dogs bed for some extra cushion. The kiddy pool my nieces outgrew is great for the dog to play in during the summer!

There are so many things you can reuse that we just normally throw away. Paper towel and toilet paper rolls are great for kids crafts or can bent into different shapes and used as stamps, they can be painted or colored for different holidays, tape the ends off and cut a slit in the side for a diy piggy bank. Combine your left over scraps of yarn into a colorful blanket or scarf! Old egg cartons are great for sorting beads, crafting supplies, etc.

What do you do to repurpose things around your house?

These are the flowers that my husband gave me for Valentines day last year.
The vase has been sitting in my kitchen for the last year.


The accent color in our bedroom is red and I thought why not use
 this vase that has been sitting around for months into storage!


Happy Crafting!

Friday, January 24, 2014

Upcycled Picture Frame

Yesterday I was cleaning upstairs when I came across the bamboo necklaces (pictured below) that we got on our vacation last month. As I was cleaning I was wondering what in the world we were going to do with these necklaces. When a moment of crafty inspiration hit... I'm going to make an awesome picture frame!

The great thing with this project is that I already had everything for it around the house. I grabbed the necklaces, my hot glue gun, and a picture frame with a flat frame. It was a simple project... just snipping the cord on the necklace, figuring out a pattern with the beads, and gluing them on the frame. 

In the end I love the way it turned out! We have a cool picture frame, that now is a special memento, to put one of our vacation pictures in.


+


+


=


Happy Crafting!

Friday, January 3, 2014

Painted Jars/Vases

Happy New Year everyone! One of my New Year's resolutions for this year is to get organized. I spent the last part of 2013 helping my parents clean out their garage and taking all of my stuff that they've been storing for me for the last few years. In there I found some wonderful memories as well as some not so wonderful ones. It was great to go through everything and figure out what I want to keep and what I'm willing to get rid of.

All of that has inspired me to clean and organize my own house... my craft room is the first room on my list. While my craft room is functional it got messy during the knitting of Christmas scarves. Now that my huge project is done I want my craft room to be super organized... especially since I have new crafting supplies to add in there.

Of course I don't do anything without a little pizzazz! So to start my craft room organization I decorated some matching jars for my knitting needles and crochet hooks. This is something I've been wanting to do for a while now but hadn't gotten around to do yet. 
I love the matching jars! It is totally coincidence that I have them... I got the big one from my dad and the smaller one from my good friend Tamara. I'm totally sentimental so these jars will always remind me of them :)
I found my inspirations here. The blog my inspiration came from is in a different language but has a picture tutorial. So I squirted my paint in and tried swirling it around...
But I wasn't getting the results I wanted. I was hoping to get some paint drops running down the sides. So I watered down the paint a bit.

I wanted a little extra pizzazz for my bigger jar and added a black dot border.
The end result is some beautiful unique storage for my craft room.
I can't wait for them to dry so I can start using them!
Happy Crafting!

Saturday, December 14, 2013

DIY Christmas

We all want a perfect Christmas... the perfect party, outfit, treats, decorations, and of course the perfect gift. Whether money is tight or you just want to add a personal touch to the holidays! Here is my DIY Christmas guide for all you!

Here is the perfect gift for your white elephant party 
or just for a funny Christmas gift!


Family or friends coming over for a visit?
Serve them some homemade chai tea!


O'Henry bars would go great with your chai or to give as a gift!
Homemade peanut butter cups are a great addition to any holiday party!

Can't find the perfect Christmas tree skirt? Neither could I! 
Why not make one?! It will add the perfect touch to your tree!

Your front door is a little empty without a great wreath!
This one is thin and easy to store!

Make Christmas memorable by making ornaments with the kids!
Turn this candy cane ornament upside down for a J to remind you that
 Jesus is the reason for the season!


Make your child a new buddy with this sock monkey!

This reusable swiffer duster is a great gift for any friend or family member!
When you're done cleaning just simply toss it is the wash and it's ready for the next time!


Your crafty friends will LOVE a thread holder! I sure do love mine!
Make this fabulous memo board for a unique gift or to help keep your Christmas organized. 
Make it your own to go with any decor. I guarantee you won't find another one like it!


Happy Christmas Crafting!


Thursday, October 31, 2013

Halloween Crafts

Does your Halloween party lacking something? It's not to late to make your own Halloween crafts! 

Make your own unique Bean Bags!


Accessorize your outfit with a great bracelet!
Create a fantastic face mask for Trick or Treating!

Happy Crafting!


Thursday, October 24, 2013

Halloween Face Mask

Looking for a do it yourself costume? Why not make your own face mask? I bought the dinosaur mask pictured below to use as a template for our Sunday school kids (not having kids of my own yet I'm not sure on the size for the eye holes and the length of  elastic).

What you'll need to make your own:
- Foam sheet (either of a pre-cut shape or you can cut your own shape)
-Sharp knife
-Tapestry Needle (you could use a regular needle just be careful)
-Elastic


I traced the eyes onto the foam pumpkin and used an exacto knife to cut them out.

I used my tapestry needle to work the elastic through the pumpkin foam.

Viola! A face mask!


Happy Crafting!

Thursday, October 17, 2013

Candy Corn Bracelet

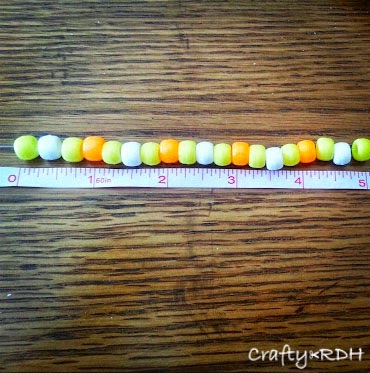
Today I'm making bracelets for the kids at church for Orange day. My favorite part of Halloween has inspired my crafting today... candy corn!
The great part is that I already had the beads and elastic in my craft room!

Since we don't have kids of our own yet we often have questions 
when doing things for Sunday School... like how do we explain this to a 5 year old?
Today I wonder how big do I make a bracelet for a 5 year old.
I estimated the length and pray the bracelets will fit!


Happy Crafting!