Showing posts with label Stockinette Stitch. Show all posts

Friday, February 20, 2015

Swatching For A Purpose

I hate swatches! It's something I normally avoid at all costs. To me it's pointless and a waste of time. It's VERY rare that I knit a swatch.

What is the point of a swatch you ask? Well it is normally done to test the gauge of yarn. You can find the guidelines for the swatch on the wrapper of the yarn. It is usually a square with knitting needles in it (there will also be one for crochet). This will tell you what size needles to use, how many rows to use, and what size square you should end up with. For example, on the yarn I'm currently using, it suggests to use size US 8 (5 mm) needles. Cast on 18 stitches, knitting 24 rows, should end up with a 4x4 inch square. If it doesn't end up the size you'll need to change your needle size. (Too small - go up in needle size, Too big - go down).

Also, keep in mind that if you use a different weight of yarn then is recommended for a project, it won't end up the same dimensions.

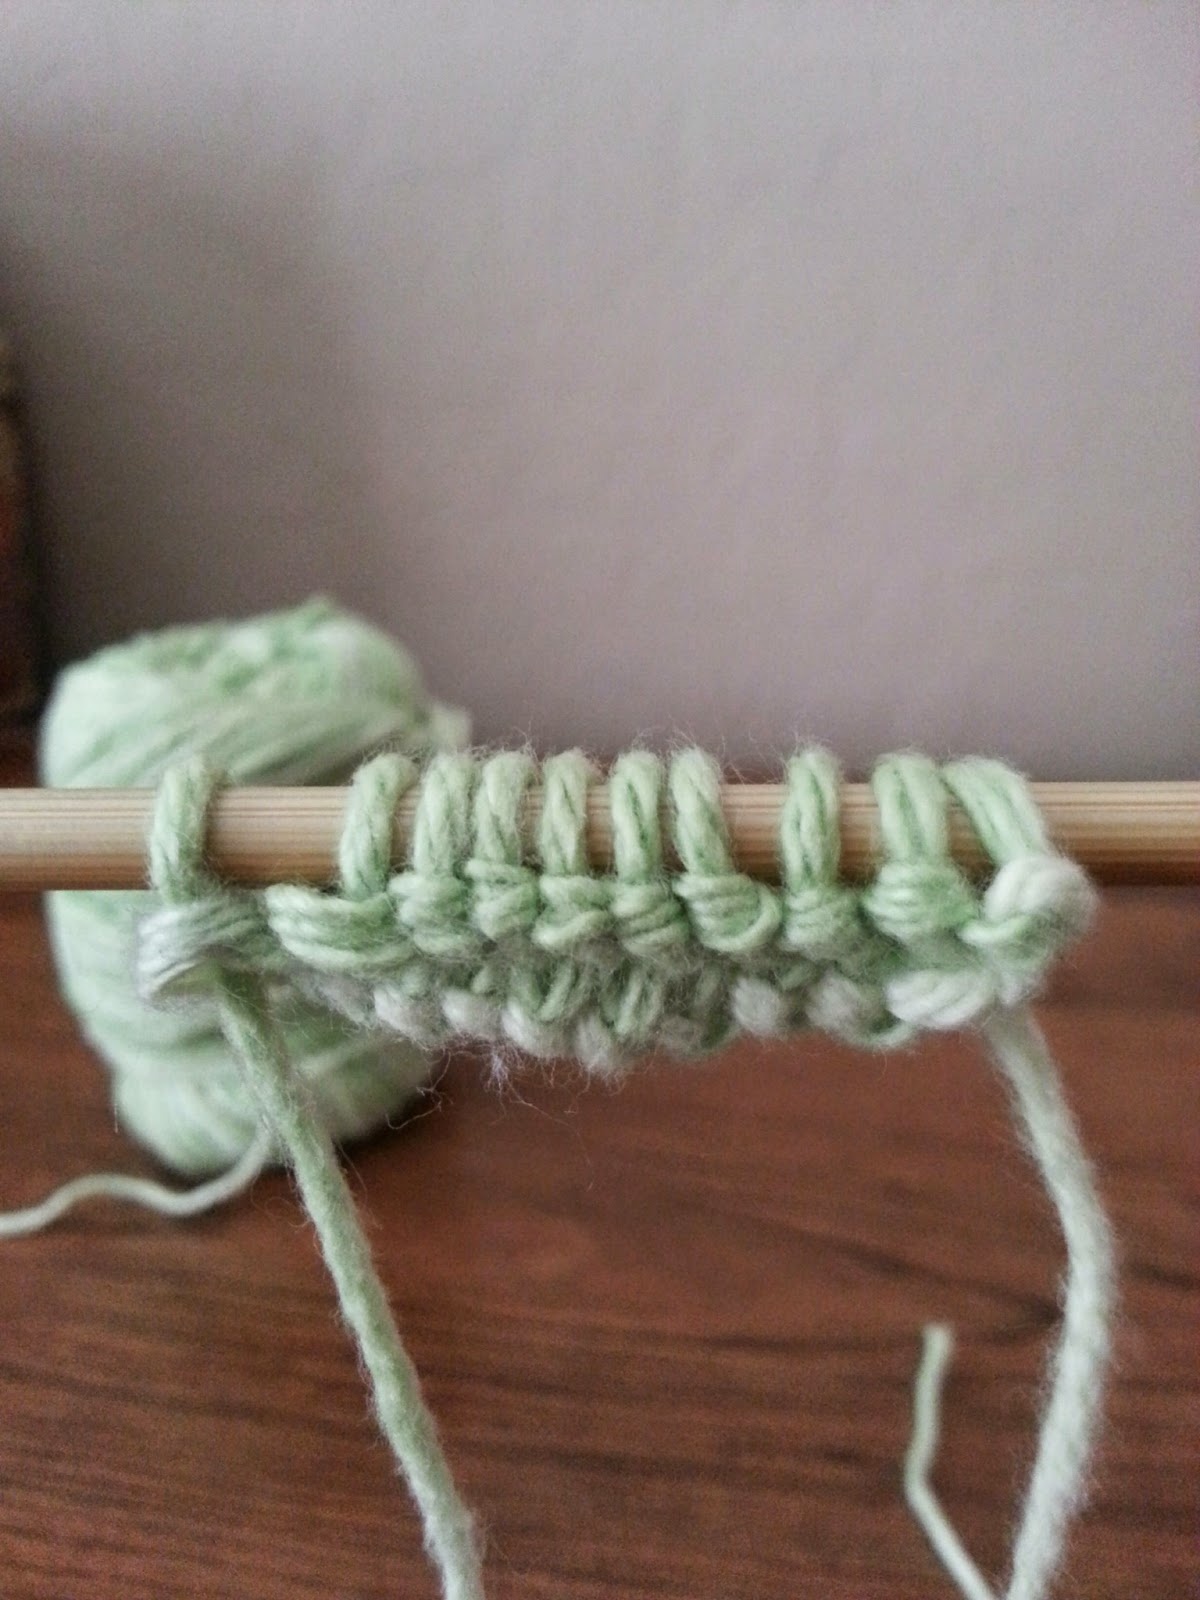
However, my favorite reason to swatch is to test out a pattern. It gives you a great idea of what the pattern will look like. This swatch I knit (pictured below) was a test for a baby blanket pattern. It similar to the pattern I used on the oceans blanket. It's the same basic pattern (the oceans blanket was knit in garter stitch and the swatch was knit in stockinette stitch). I wanted to see because of the border would stop the stockinette blanket from rolling up.

The sad news is that it did still roll up a bit. The good news is that I made this for a friend to use in her Christmas nativity scene, to line the manger for baby Jesus.


I like the way it looks. I think for future baby blankets the outer border will need to be done in garter stitch.

Happy Crafting!

Friday, November 21, 2014

I Wish I May, I Wish I Might

This is the last star that I've made for the project I'm working on. The pattern can be found here. Even though the pattern is for garland, I only used the star knitting pattern. Sadly this was my least favorite star that I've made (mainly because it wouldn't lie flat) but it was the right size. I was much happier with the star after I gave it a quick iron so it would stay flat!

Of course since this was the smallest star, it was also the quickest to knit!


Here is the pattern by Duo Fiberworks:
(PatternCopyright 2010 Katie Startzman, Duo Fiberworks)

Cast on 1 stitch
Row 1: Knit
Row 2: Backward loop cast on 1 stitch, knit 1, KFB [3 sts]
Row 3: Knit
Row 4: KFB, knit 1, KFB [5 sts]
Row 5: Knit
Row 6: KFB, knit 2, KFB [7 sts]
Row 7-8: Knit 2 rows
Row 9: Backward loop cast on 5 stitches at beginning of next 2 rows [17 sts]
Row 10: K2tog, knit 13, k2tog [15 sts]
Row 11: Knit
Row 12: K2tog, knit 11, k2tog [13 sts]
Row 13: Knit
Row 14: K2tog, knit 9, k2tog [11 sts]
Row 15: Knit
Row 16: K2tog, knit 7, k2tog [9 sts]
Row 17: Knit 4, KFB, knit 4 [10 sts]
Row 18: KFB, knit 3, KFB [7 sts] turn, leave remaining stitches on needle
Row 19: Knit
Row 20: KFB, k2tog, knit 2, k2tog [6 sts]
Row 21: Knit
Row 22: KFB, k2tog, knit 1, k2tog [5 sts]
Row 23: Knit
Row 24: KFB, k2tog twice [4 sts]
Row 25: K2tog twice [2 sts]
Row 26: K2tog [1 st]

Last point
Row 1: Pick up stitch next to point just completed. Starting with that stitch, on the “inside” of the star, knit 6, KFB [7 sts]
Row 2: Knit
Row 3: K2tog, knit 2, k2tog, KFB [6 sts]
Row 4: Knit
Row 5: K2tog, knit 1, k2tog, KFB [5 sts]
Row 6: Knit
Row 7: K2tog twice, KFB [4 sts]
Row 8: K2tog twice [2 sts]
Row 9: K2tog [1 st]
Pull yarn though last stitch, weave in ends securely.

Happy Crafting!

Thursday, October 2, 2014

Ocean Blue Blanket

The long awaited blanket is finally done! I have been knitting on this blanket off and on since March. This pattern is great for many reasons... it's simple and easy to make, you can make it as small or as large as you want, and you can add an accent color through the yarn over trim.

This oceany blanket was knit much larger then the usual baby blankets I knit but C was born before I started knitting. Since he didn't get a Nadia original baby blanket, he now has a Nadia original kids blanket! I'm happy to say he loves it and his oceans blanket goes great with his boat bed!


His wonderful momma took these beautiful pictures. You can find more of the pictures of the blanket along with all of other work on her blog.


Thursday, July 10, 2014

How to Knit: Stockinette Stitch

Stockinette stitch is one of my favorite stitches. I love the way it looks the same on one side. The only down side is that if you don't use some sort of border around the stockinette stitch the edge will curl. You could block your knitting to try and prevent this but blocking isn't something I've done yet for my knitting.

Odd Rows:
You begin with the knit stitch for the entire row.
You can find my tutorial for the knit stitch here.


All odd numbered rows will be knit.
(1, 3, 5, etc)


Even Rows:

All even rows will be purled.
You can find my tutorial for the purl stitch here.


Alternating between one row knit and
the next knit will make the purl side look like the picture above.


And the knit side will look like this.


Happy Crafting!

Thursday, February 20, 2014

Felted Slippers

These slippers have long been on my to do list and I'm happy to say they are finally done! I have been wanting to knit myself slippers since May last year and had found this cute pattern but there was a charge. I'm not a huge fan of having to pay for a pattern so I kept searching the internet for a similar pattern.

For those of you who knit or crochet I absolutely love Ravelry.com! They have a ton of patterns and you can save the ones you like in your account. It was from Ravelry that I found my next pattern which was originally in German (I think) and translated into English. When I was finally ready to start knitting the slippers last month I realized that the pattern wasn't making much sense to me and so I began to search for yet another pattern. I swear I found this one by the Grace of God! The major thing I did differently the slippers then the pattern was that I used circular knitting needles instead of a loom. Having used a loom previously (I still prefer knitting needles) and knowing that a loom creates one side knit I just knit in stockinette stitch.

Please forgive the different lighting in my photos and the appearance that the wool is different colors. The pictures were taken in stages as I was working on the slippers and taken in different locations and different times of the day.
The basis of the slippers. I found this part rather boring to knit.


As of yet I don't own every knitting notion so I used some scrap yarn as a stitch marker.


Finishing the slipper and gathering the toe together.


I used a mattress stitch (taking the yarn in between the knitted v's from both sides to make an invisible join).
You can find a great youtube video here to show you how it's done.

The finished toe of the slipper.


Pre Felting: Place the slippers in a pillowcase and run them through the wash with towels to
felt them ie shrink. The pattern said to put them in a zippered pillowcase. I don't have one so I just
knotted the end of the pillowcase and it worked fine.

Post Felting: I ran the slipper through the wash on a regular cycle and they came out too big still.
Once more through a light cycle and they fit great. I wore them for a few minutes so that they could get the shape of my feet and let them air dry.


Here they are all ready for the straps.


I first added the buttons to the straps and then the straps to the slippers.
I love the way they turned out!
Hopefully they'll keep my feet nice and warm on our tile floors.

Happy Crafting!

Sunday, December 22, 2013

Welted Scarf: Scarves for Christmas

Here is another unique scarf in my Scarves for Christmas collection. I found this pattern on Pinterest of course! I picked this yarn for B long before I chose a pattern. I kept debating between a few patterns until I found this one and I knew it was perfect (hopefully!).

It took a bit of internet research to clarify how to do the welts but once I got the hang of it, it's simple! I live this because it's not a set pattern and each welted scarf you make will look different! 

How to make a welt:
The scarf is knit in stockinette stitch with the welts being made on the purl side. 
To begin knit a few rows in stockinette stitch (the pattern suggests 5 rows). On the purl side 
pick up a purl stitch with your right needle and transfer it to your left needle. Now knit both the transfered stitch and regular stitch together. Continue this to make your welt. For this first welt do it across the entire row (the same for your ending row to make it uniform).

It is recommended to make your welt at least 6 stitches wide otherwise it looks odd. After my first welt I changed how mant rows I used to welt together (changing from 5 to 3-4). I didn't like the way the large welt looked.

To make the scarf more interesting I varied where I placed the wekts, how long they were, as well as how wide. Some started out wider and got smaller; giving it a horizontal look. Some rows started and ended with welts. 

All in all I love the way it turned out!  I haven't knit a scarf yet I haven't liked... probably because if I didn't like it to begin with I would take it out and start again!

Now that you know the basics of welting go out and knit welts!
Happy Crafting!
The pattern can be found here.

Friday, November 22, 2013

Stockinette Stitch with Picot Hem: Scarves for Christmas

This scarf is simple yet complex. It's done in stockinette stitch... simple enough right? What about two stranded yarn? A little bit more difficult but the end result is gorgeous and I love the two toned effect. The scarf consists of three different shades of pink. The magenta pink is done through out the entire scarf with the second colors being half rose pink and half light pink.  The Picot hem is done in two stranded magenta. Then end result is a beautiful, thick scarf for little A. I try to make each scarf unique to each person as much as I can. She has a unique condition where she can't feel hot or cold so I made her scarf extra thick to ensure she stays warm.

The scarf before the picot hem.
Picot hem: trying to make the scarf as girly as possible!
The finished product!

Happy Crafting!


Friday, October 25, 2013

Triangle Scarf: Scarves For Christmas

Let me start off by saying that someone out there may have already come up with this pattern. I was looking for something simple but cool for my 8 year old niece L.G. 

What I decided to do was basically a stockinette stitch but with a twist. I started my first row with a purl stitch, alternating my one stitch each row to form a zigzag pattern for my triangles. Below is the pattern I used. Just keep rotating through the first and second triangle. I also alternated shade of pink for the scarf.


First Triangle:
P K K K K K K K K K K K K K K K K K K K K
K P K K K K K K K K K K K K K K K K K K K
K K P K K K K K K K K K K K K K K K K K K
K K K P K K K K K K K K K K K K K K K K K
K K K K P K K K K K K K K K K K K K K K K
K K K K K P K K K K K K K K K K K K K K K
K K K K K K P K K K K K K K K K K K K K K
K K K K K K K P K K K K K K K K K K K K K
K K K K K K K K P K K K K K K K K K K K K
K K K K K K K K K P K K K K K K K K K K K 
K K K K K K K K K K P K K K K K K K K K K
K K K K K K K K K K K P K K K K K K K K K
K K K K K K K K K K K K P K K K K K K K K
K K K K K K K K K K K K K P K K K K K K K
K K K K K K K K K K K K K K P K K K K K K 
K K K K K K K K K K K K K K K P K K K K K
K K K K K K K K K K K K K K K K P K K K K
K K K K K K K K K K K K K K K K K P K K K
K K K K K K K K K K K K K K K K K K P K K
K K K K K K K K K K K K K K K K K K K P K
K K K K K K K K K K K K K K K K K K K K P

Second Triangle:
K K K K K K K K K K K K K K K K K K K P K
K K K K K K K K K K K K K K K K K K P K K
K K K K K K K K K K K K K K K K K P K K K
K K K K K K K K K K K K K K K K P K K K K
K K K K K K K K K K K K K K K P K K K K K
K K K K K K K K K K K K K K P K K K K K K
K K K K K K K K K K K K K P K K K K K K K
K K K K K K K K K K K K P K K K K K K K K
K K K K K K K K K K K P K K K K K K K K K
K K K K K K K K K K P K K K K K K K K K K
K K K K K K K K K P K K K K K K K K K K K
K K K K K K K K P K K K K K K K K K K K K
K K K K K K K P K K K K K K K K K K K K K
K K K K K K P K K K K K K K K K K K K K K
K K K K K P K K K K K K K K K K K K K K K
K K K K P K K K K K K K K K K K K K K K K
K K K P K K K K K K K K K K K K K K K K K
K K P K K K K K K K K K K K K K K K K K K
K P K K K K K K K K K K K K K K K K K K K
P K K K K K K K K K K K K K K K K K K K K

 I found a knit trim on pinterest  (because who doesn't need fun ends on a scarf?!) from Lions Brand of triangles that I thought would go perfectly.

Put a slip knot on needle.


1st row (RS) Kfb. 2 sts.
Kfb = Knit Front and Back

2nd row Kfb, k 1. 3 sts.

3rd row Kfb, k 2. 4 sts.

4th row Kfb, k 3. 5 sts.

Continue to increase one st at the beginning of every row until there are 7 sts. Break the yarn and leave sts on a spare needle. Make the required number of points without breaking the yarn after the last one. Next row K 7 sts of last point, with RS facing k each set of 7sts in turn. 

Work 2 rows garter stitch. Bind off. I added one extra stitch in the middle to make a total of 15 stitches because my scarf is 15 stitches wide.

With knitting in stockinette stitch the edges curl unless you do a border in a different stitch.
You can also steam the knit item and let it dry flat.


Once dry all that's left is to attach the knit trim to the ends of the scarf.
I used the yarn tail that was left to attach the knit trim triangles.

One more scarf done and many more to go :)

A close up view.

Happy Crafting!

Friday, June 21, 2013

Enjoying The Morning

I'm spending the morning in enjoying the outdoor shade and knitting. (We live in Arizona and it is quite warm here). Our dog, Zeke, inspired me to change my morning off routine when he looked so happy and content laying in the grass.
I am currently working on yet another baby blanket for a friend who is due in about month. Everyone seems to be pregnant these days but me! I know my time will come but after two miscarriages I can't wait to have my own baby in my arms and to be knitting or sewing something for my children.
Back to the blanket... I wanted to do something pretty and feminine as she is having a girl. I found this beautiful trim online and thought that would be great for a blanket.
I decided to only do the trim on the sides and just knit the trim and blanket as one piece. In order to do this one of the trim sides is knitted backwards.  The first side when you start on the end follows the pattern but once you get to the opposite end you're starting on the backside of the trim. I thought everything would be fine because row 1-5 is the same backwards and forwards but I've run into some trouble with row 6!  Row 6 you slip the first stitch, bind off 3 and knit 3. I assumed if I knit 3, slip 1, bind off 3 it would work the same. No! Then I thought if I knit 3 and bind of 4 that would work.  No again! So I consulted with mother-in-law who is a far better knitter then I am and has knit much longer then I have. She came up with knit 3, bind off 2, knit 2 together.  I thought that sounded like a great idea but no such luck!
This has been driving me crazy. I've been racking my brain over what I can do on the other side for row 6 to get both sides to look the same! My poor husband has had to listen to my mumblings about this for a week now! Finally last night I think I came up with it! On row 6 after knitting 3, transfer the remaining stitches to the other needle, slip and bind of as usual and then transfer them back to the other needle again!
It sounds time consuming and a pain but I'm happy I have finally found a solution! In the future I think it would be easier to knit the trim separately and attach it to the finished blanket!