Welcome to the second installment of learning how to knit! Here is my tutorial on the knit stitch... one of the basic stitches of knitting. I love to knit... I find it relaxing and I love creating something unique. I hope through my learn to knit series that you might learn to love knitting too!
FYI: I knit left handed so all of my tutorials will done this way
Some info and tips for knitting:
-The needle with the stitches always goes in your left hand
-The working yarn is held in your dominant hand
- While knitting the stitches will move from the left needle to the right
-After a row is completed the needle with all of the stitches goes back into your left hand
-The tension of the working yarn is key to an even and beautiful stitch
-Practice playing with the yarn and figuring out how you like to hold it
(I find it best to hold it in the same way to maintain the same yarn tension)
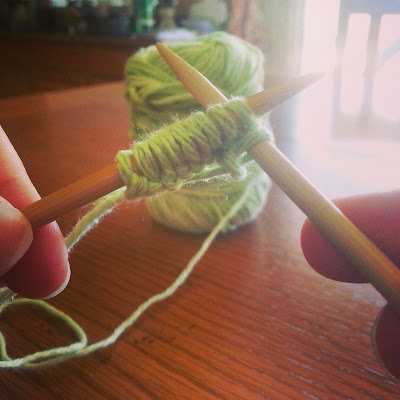
So here are is my knitting needle with 10 stitches cast on. Find a refresher on how to cast on here.
Insert the knitting needle under the first stitch from front to back.
Wrapping your working yarn (attached to the ball) in a clockwise motion around the needle.
Move the needle in your right hand back through the stitch....
so that the working yarn you wrapped around the needle remains. Push this stitch off the left needle and you've completed your first knit stitch!
The second is the same as the first. Insert the needle...
wrap the working yarn clockwise...
pull back through and push off.
Here is the row completed. This is what the knit stitch looks like (little v's). In knitting patterns this is known as the right side (RS).
This is what the back side looks like... the wrong side (WS).
Now for the second row! Done in the same fashion as the first. Inserting the needle...
wrapping the yarn clockwise...
pulling the needle back through...
and pushing it off the left needle.
Insert the needle from front to back.
Wrap the yarn clockwise.
Pull the needle back through and push it off the needle.
Second row complete!
With the knit stitch the side facing you while knitting will look like v's and the back side will look like bumps. In knitting terms knits and purls. Knitting every row (like I've done in the tutorial) is known as Garter Stitch.


No comments:
Post a Comment